
Learn how to make a beautiful lattice pie crust over your fruit pies by following my easy step-by-step guide. The weaving technique is way easier than it seems!
Email me this recipe
We’ll send it straight to your inbox, along with weekly food inspiration!
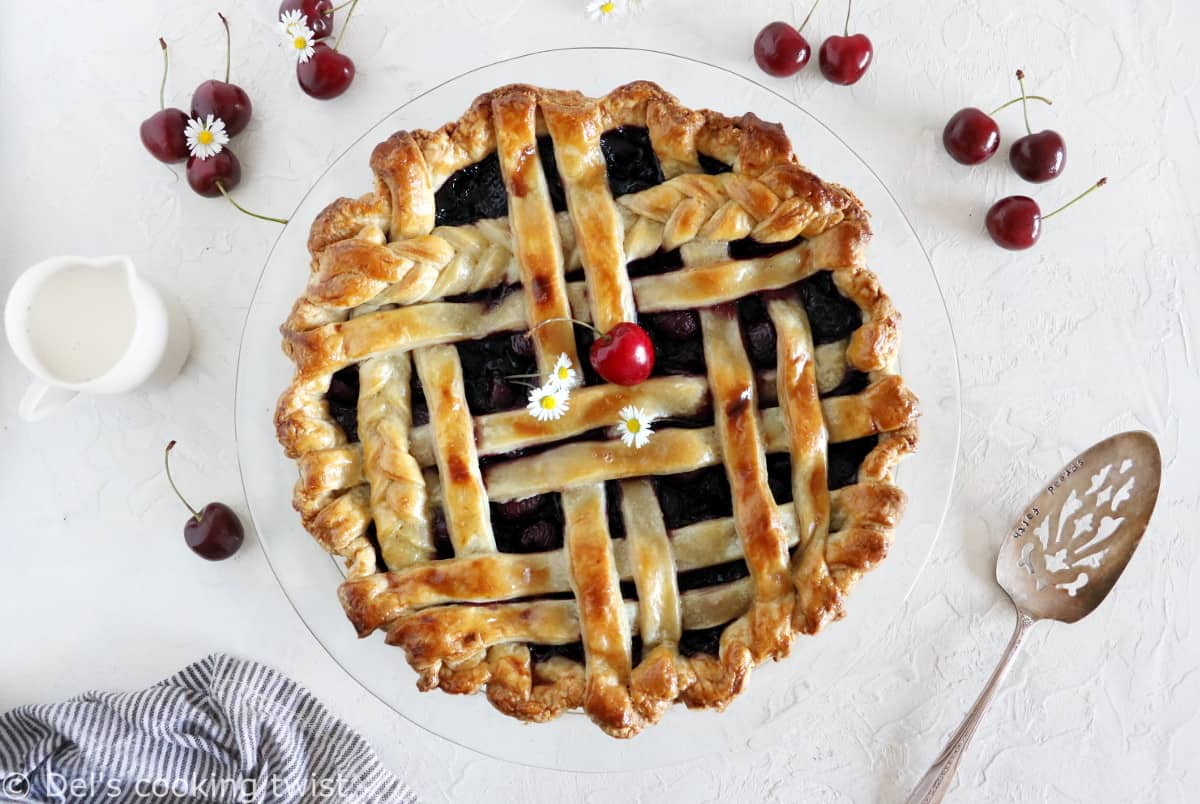
Weaving a lattice crust over a delicious juicy fruit pie is art! I still remember my grandmother would always use leftover dough to make a lattice pie crust over a fruit pie (her favorite dessert). As a little girl, I was fascinated by this beautiful design she would master so easily.

As I grew up, I soon understood that 1/ homemade pie crust is totally worth the extra effort (it tastes 100x better than ready-to-use pie crust) and 2/ making a lattice pie crust is actually pretty easy. Let me guide you through the process so you can be a lattice pie crust expert too, whether you go for a classic one or a braided one.
Rule #1: choose a strong pie crust
The choice of the right pie crust recipe is key in the lattice pie crust process. Different pie crusts mean different textures, and ultimately different results. Some recipes call for butter, others for shortening instead, some add an egg while others don’t.
When it comes to weaving a pie, you need a strong pie crust, easy to handle. This is the only way you can guarantee the strips of dough will hold their shape when weaving the design on top of your pie. My go-to recipe is my all-butter pie crust, a recipe I created a few years ago for my Classic Apple Pie.
It’s a very simple recipe, that yields 2 crusts, one for the bottom, one for the lattice process. If you’re new to homemade pie crust, I strongly recommend you start with this recipe. It will give you confidence and you won’t ever buy a ready-to-use pie crust anymore!
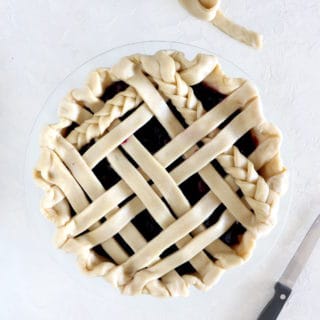
Quick step-by-step process
A picture is worth a thousand words, and this is particularly true when it comes to weaving a lattice pie crust. So be sure to check the step-by-step photos in this post and keep in mind the following:
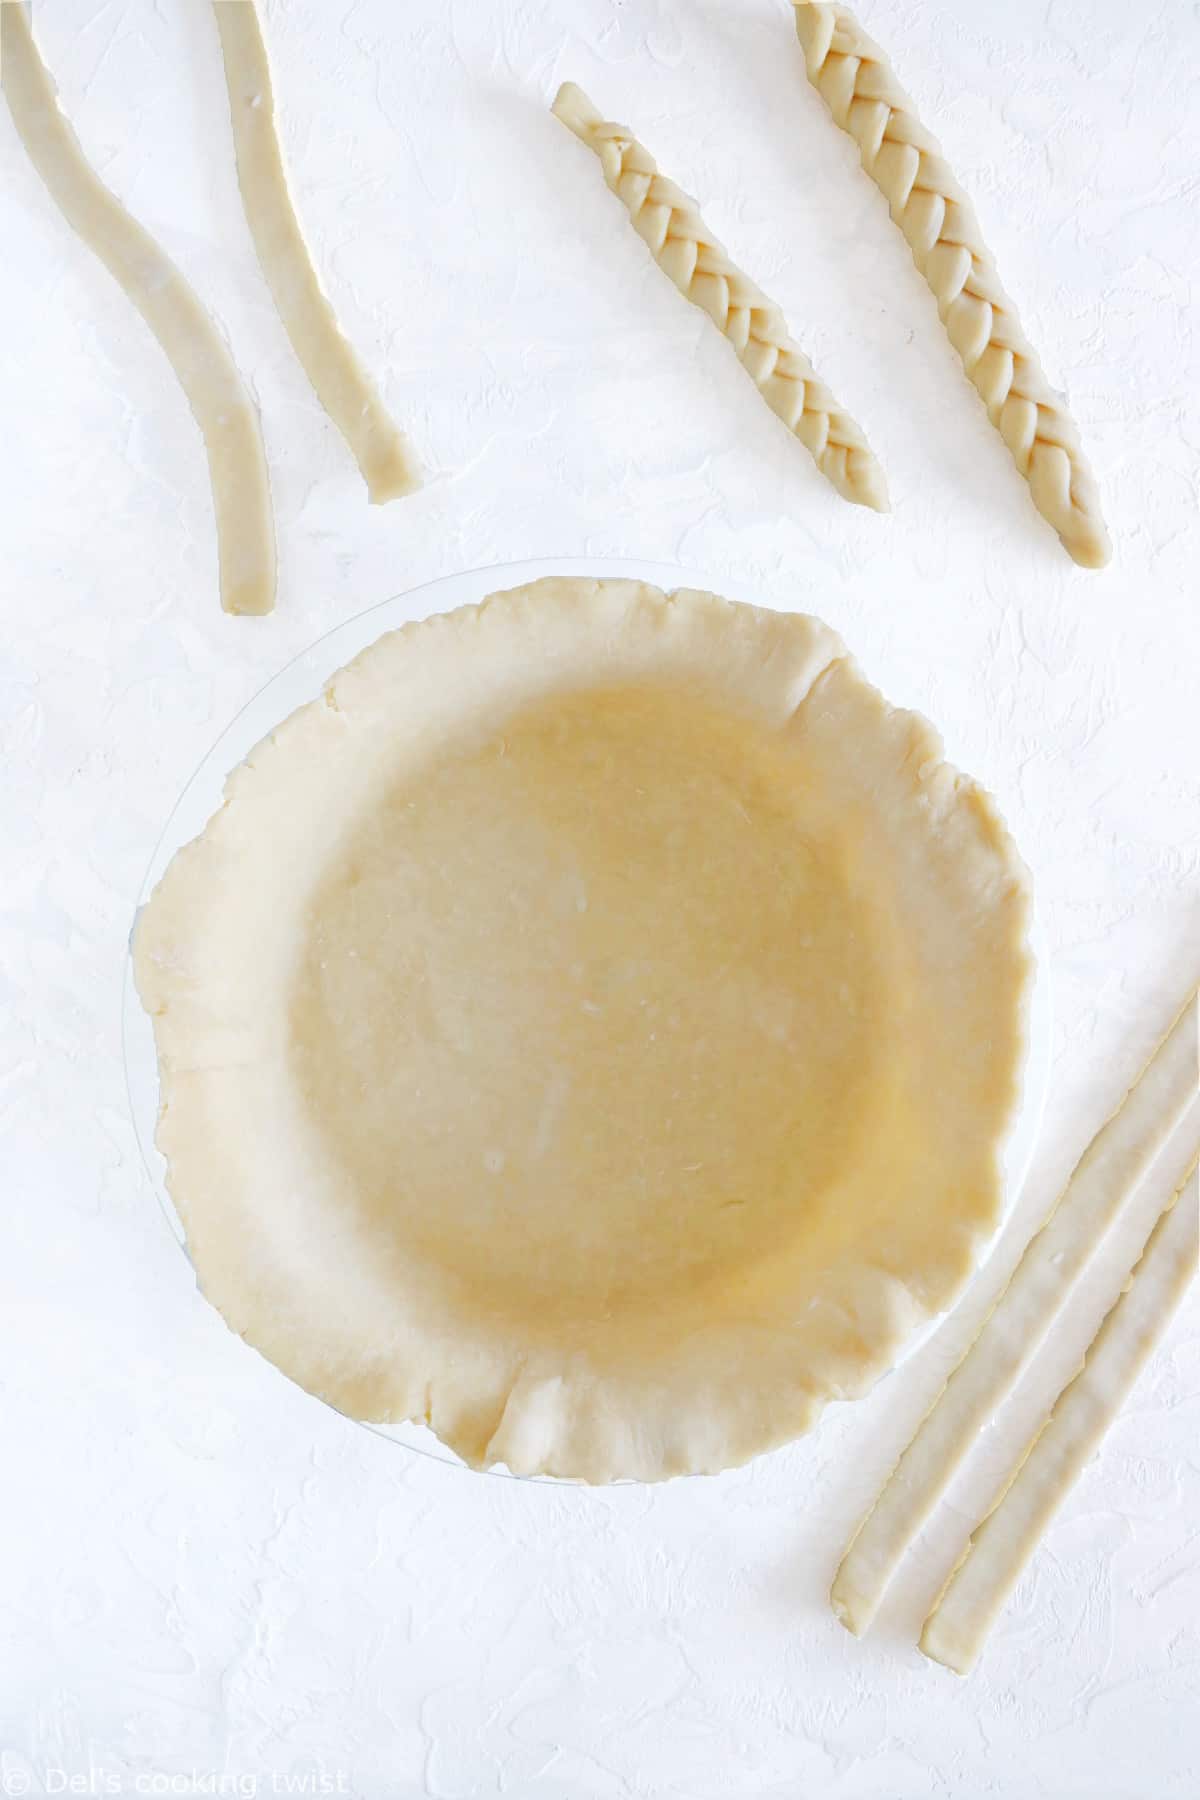
- Roll out the first pie dough and lay it across the pie dish.
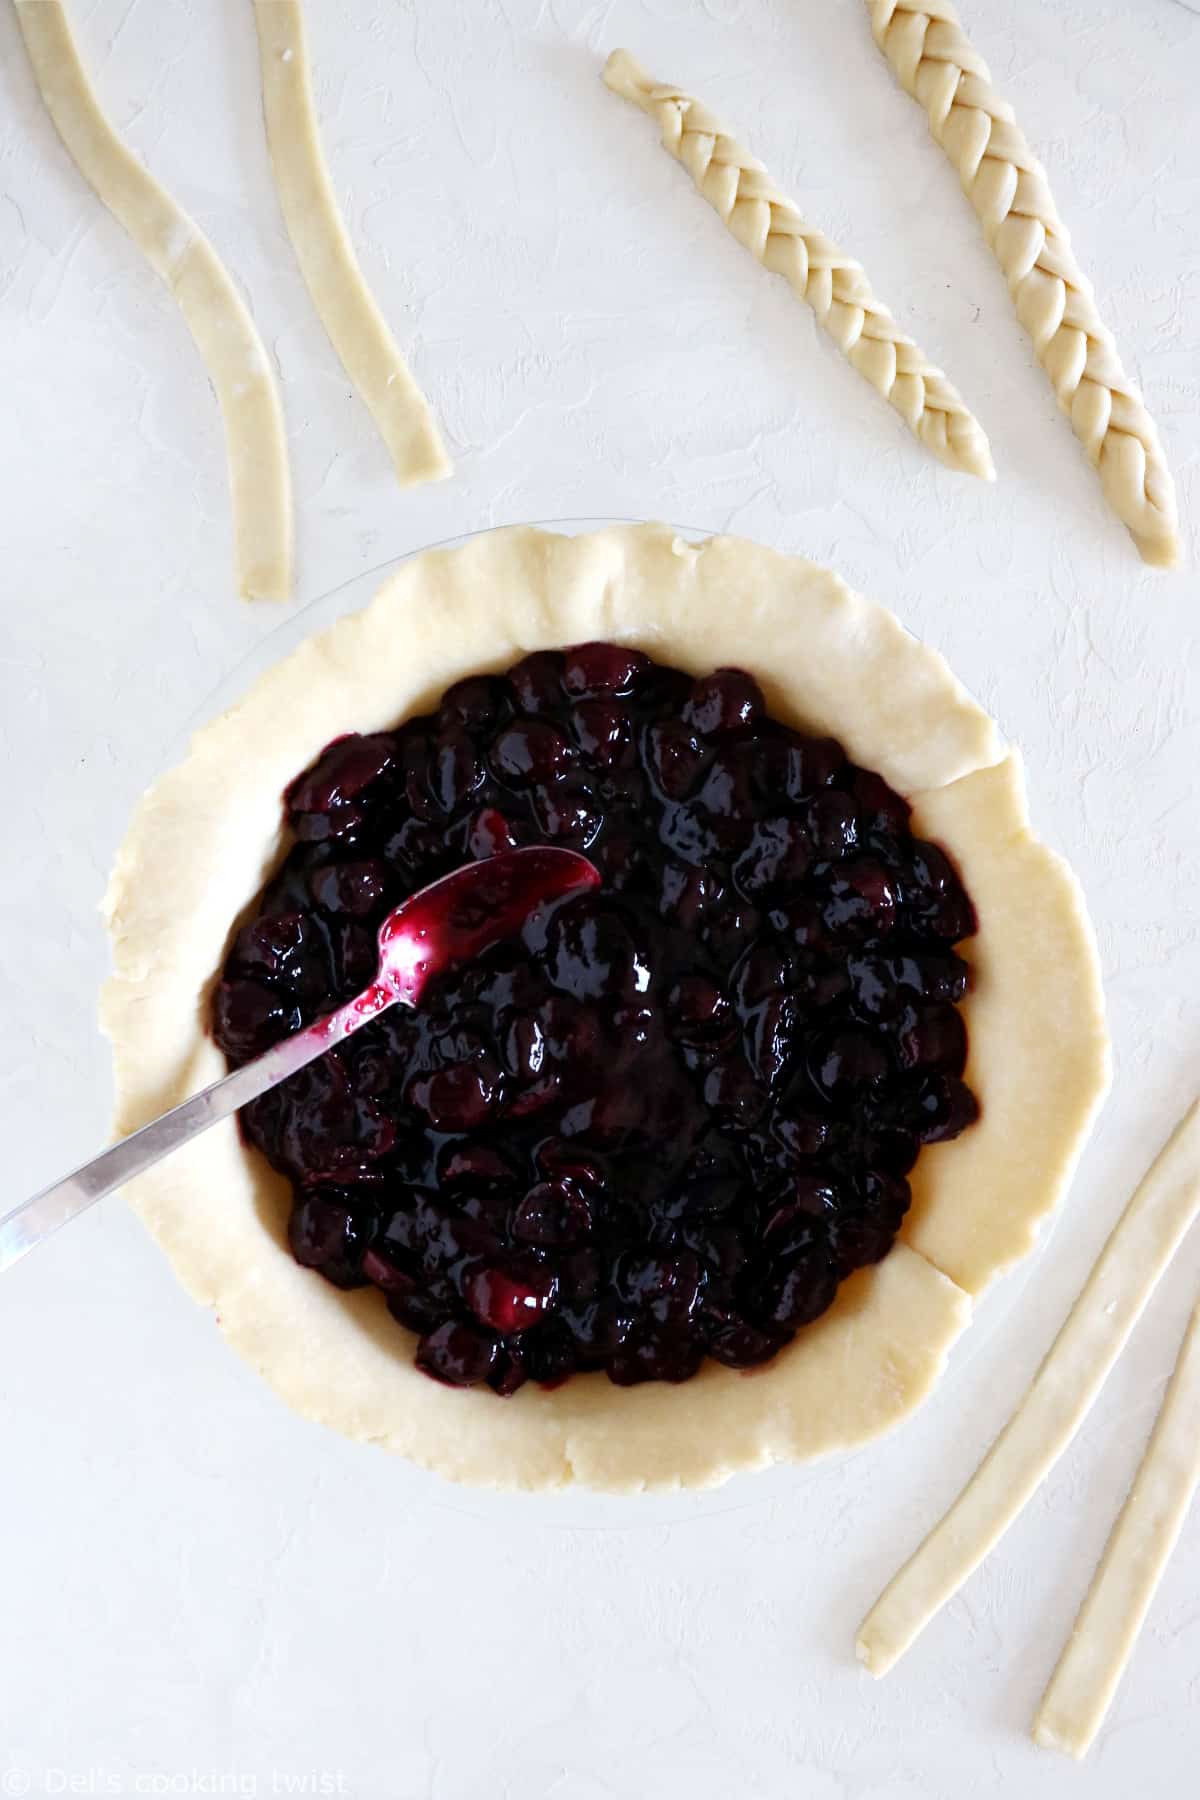
- Add the filling (any fruits), making sure it’s higher than the pie dish (it will reduce in volume when baking).
- Lay out the second pie dough.
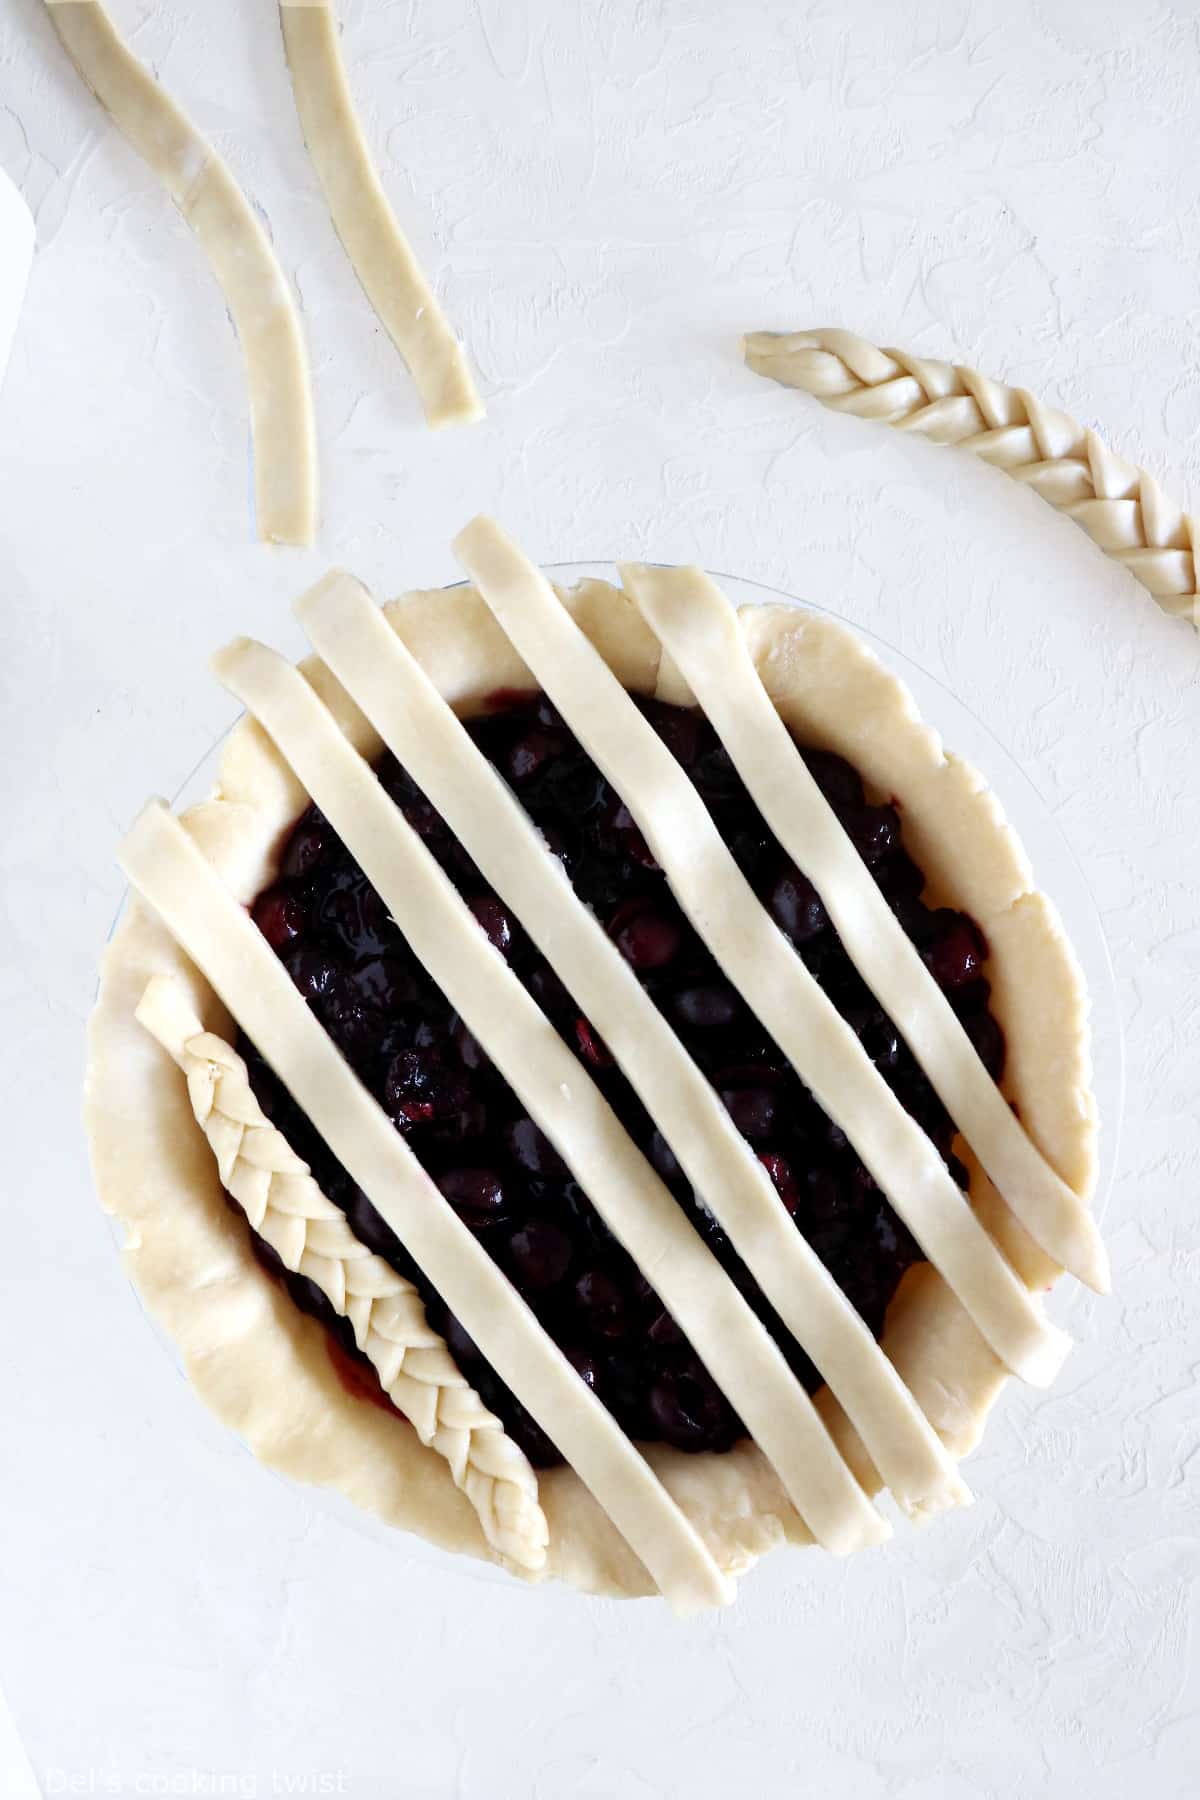
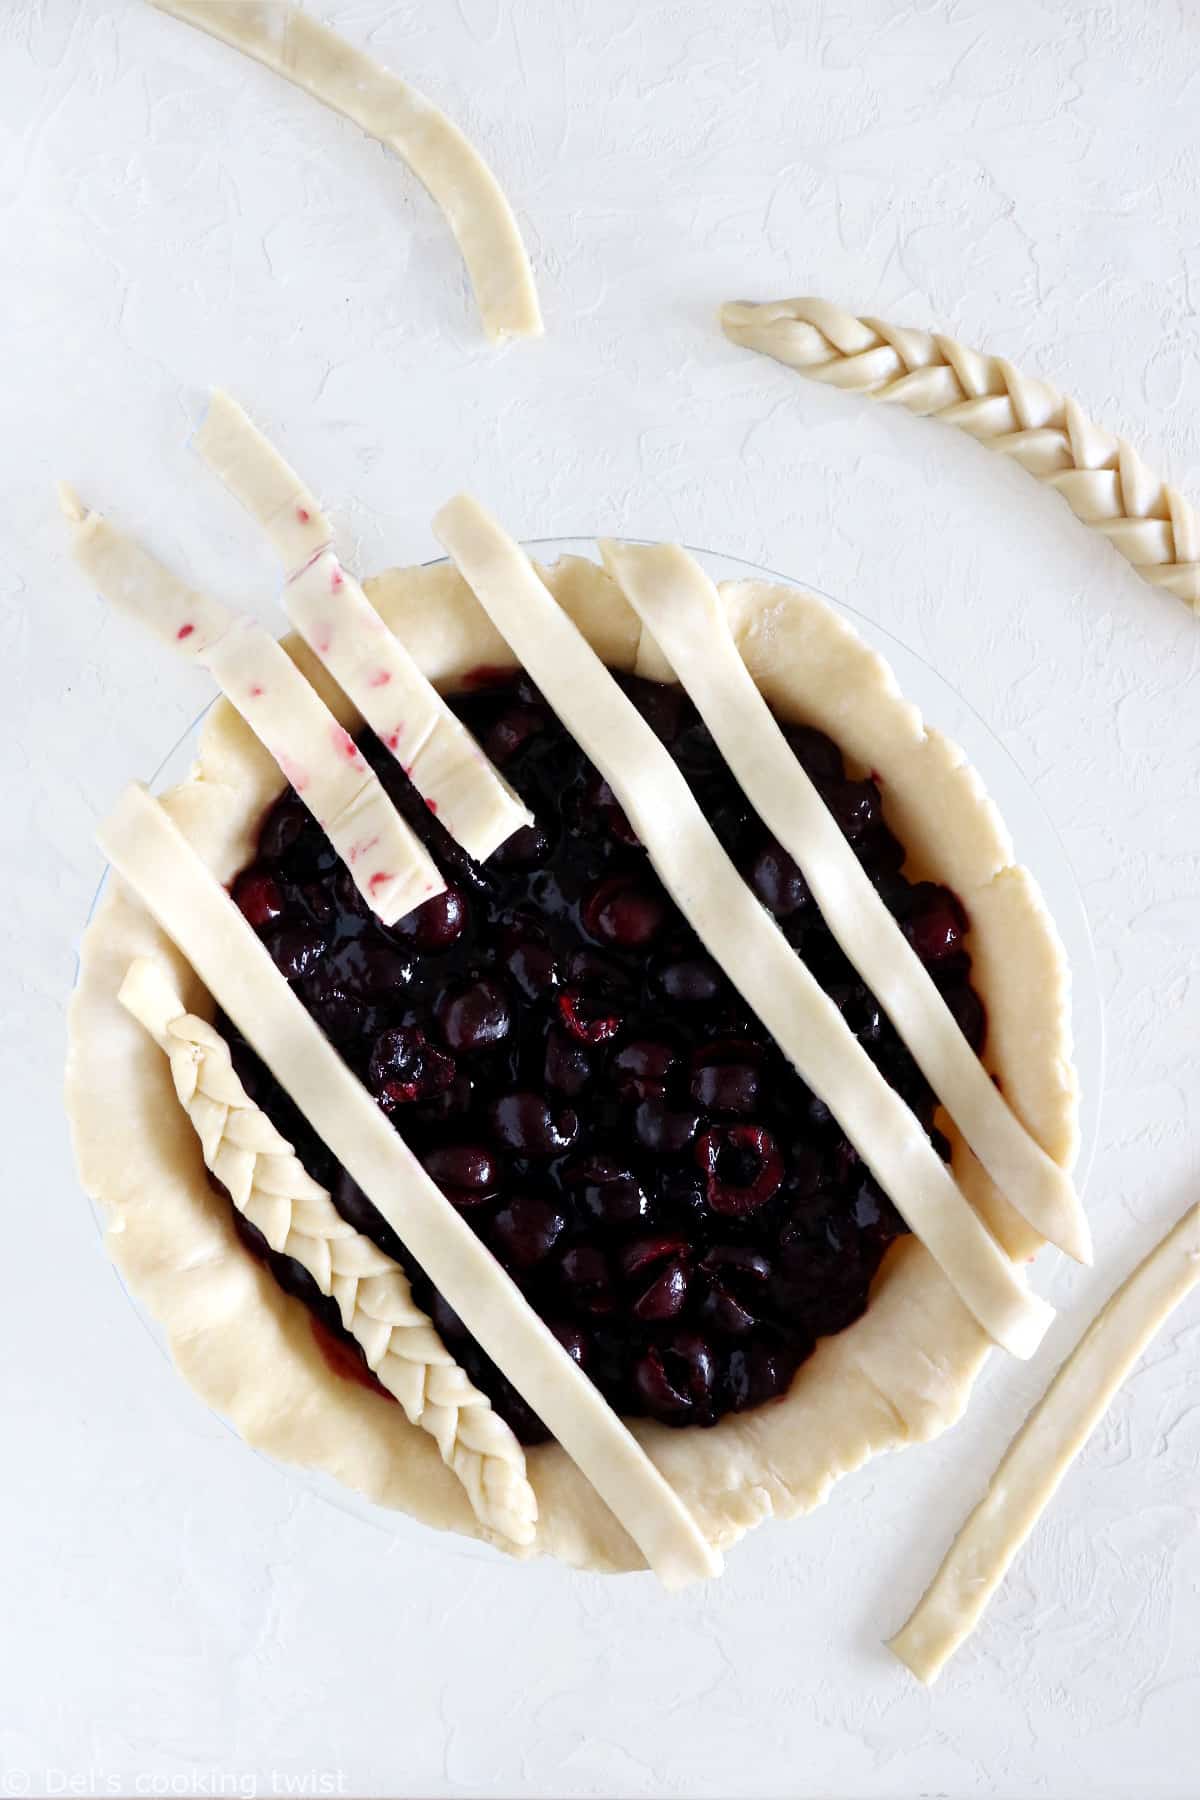
- Cut the dough into strips.
- Arrange half of the strips over the pie, in parallel lines.
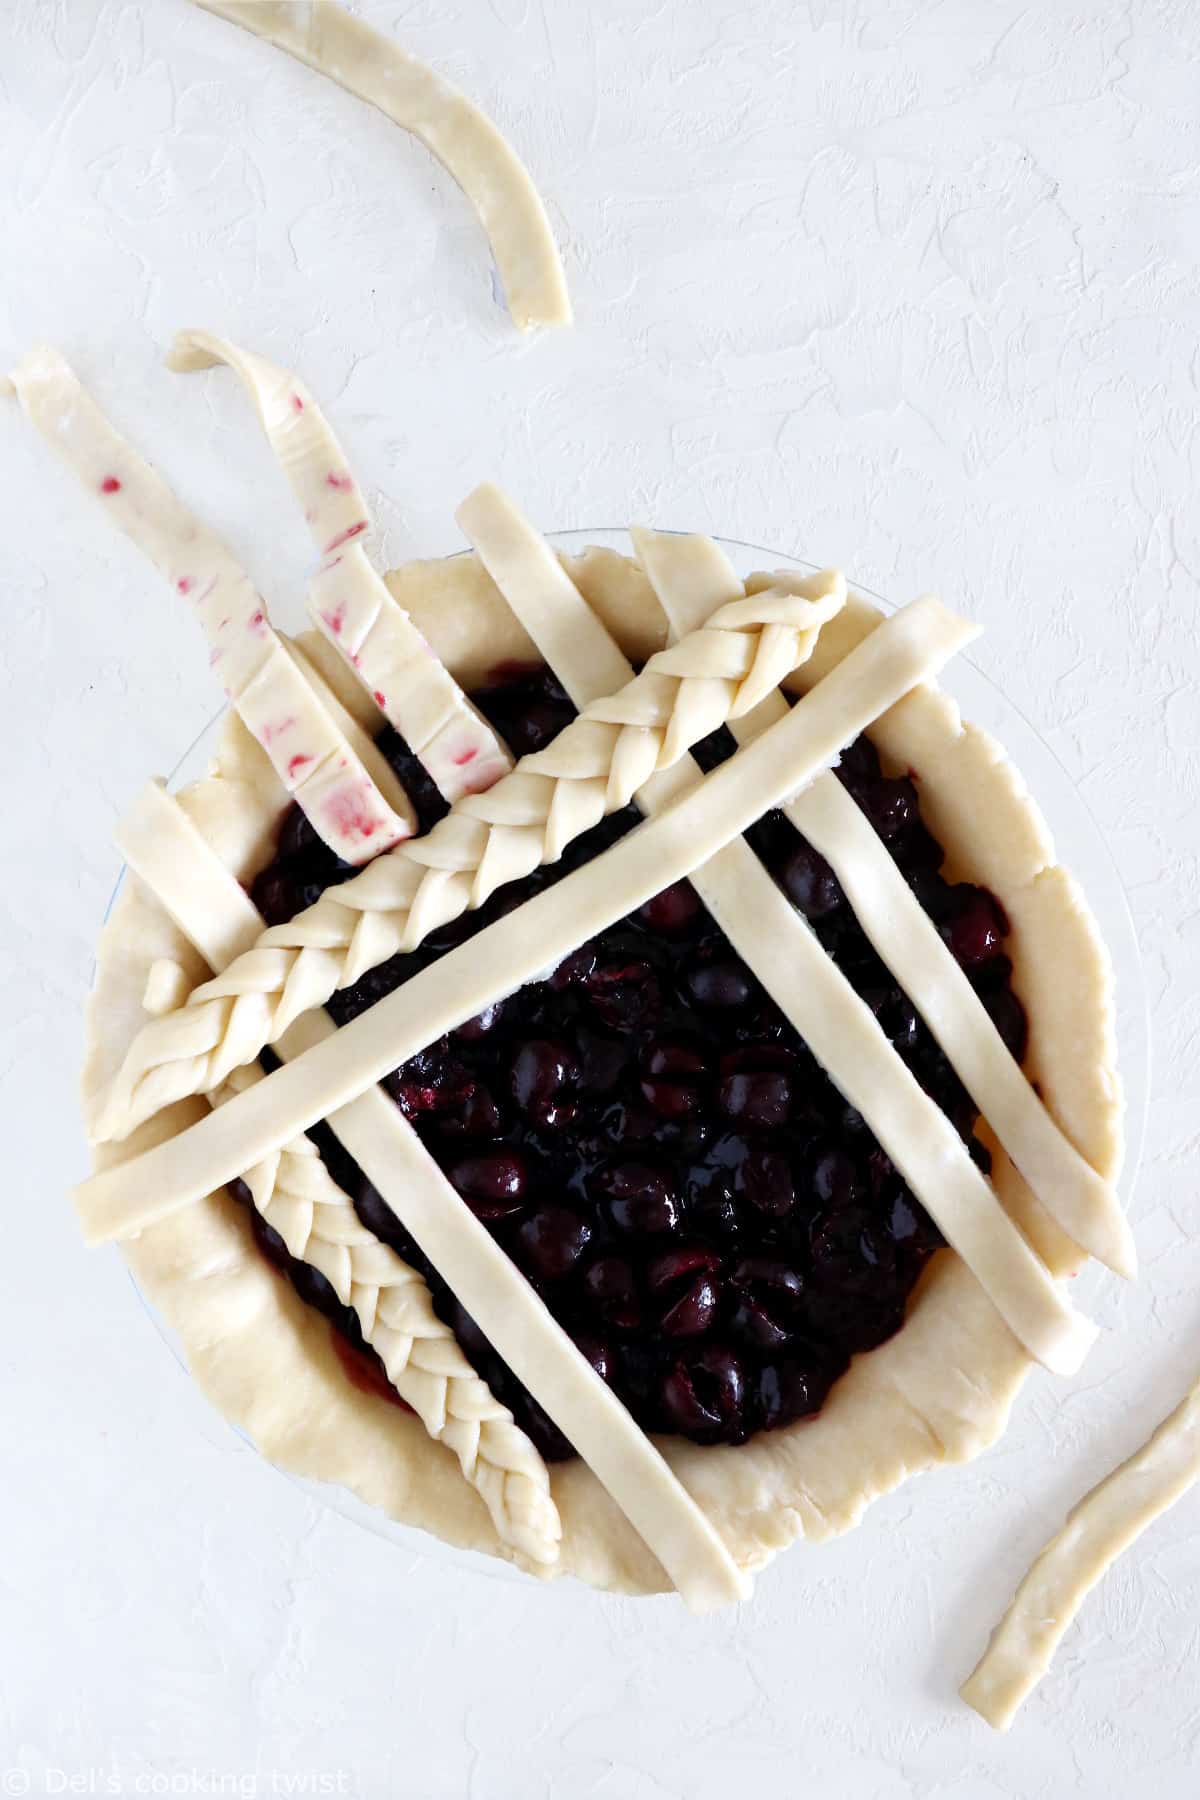
- Fold back every other strip (or two by two, it’s up to you).
- Lay a strip over the pie, perpendicular to the others.
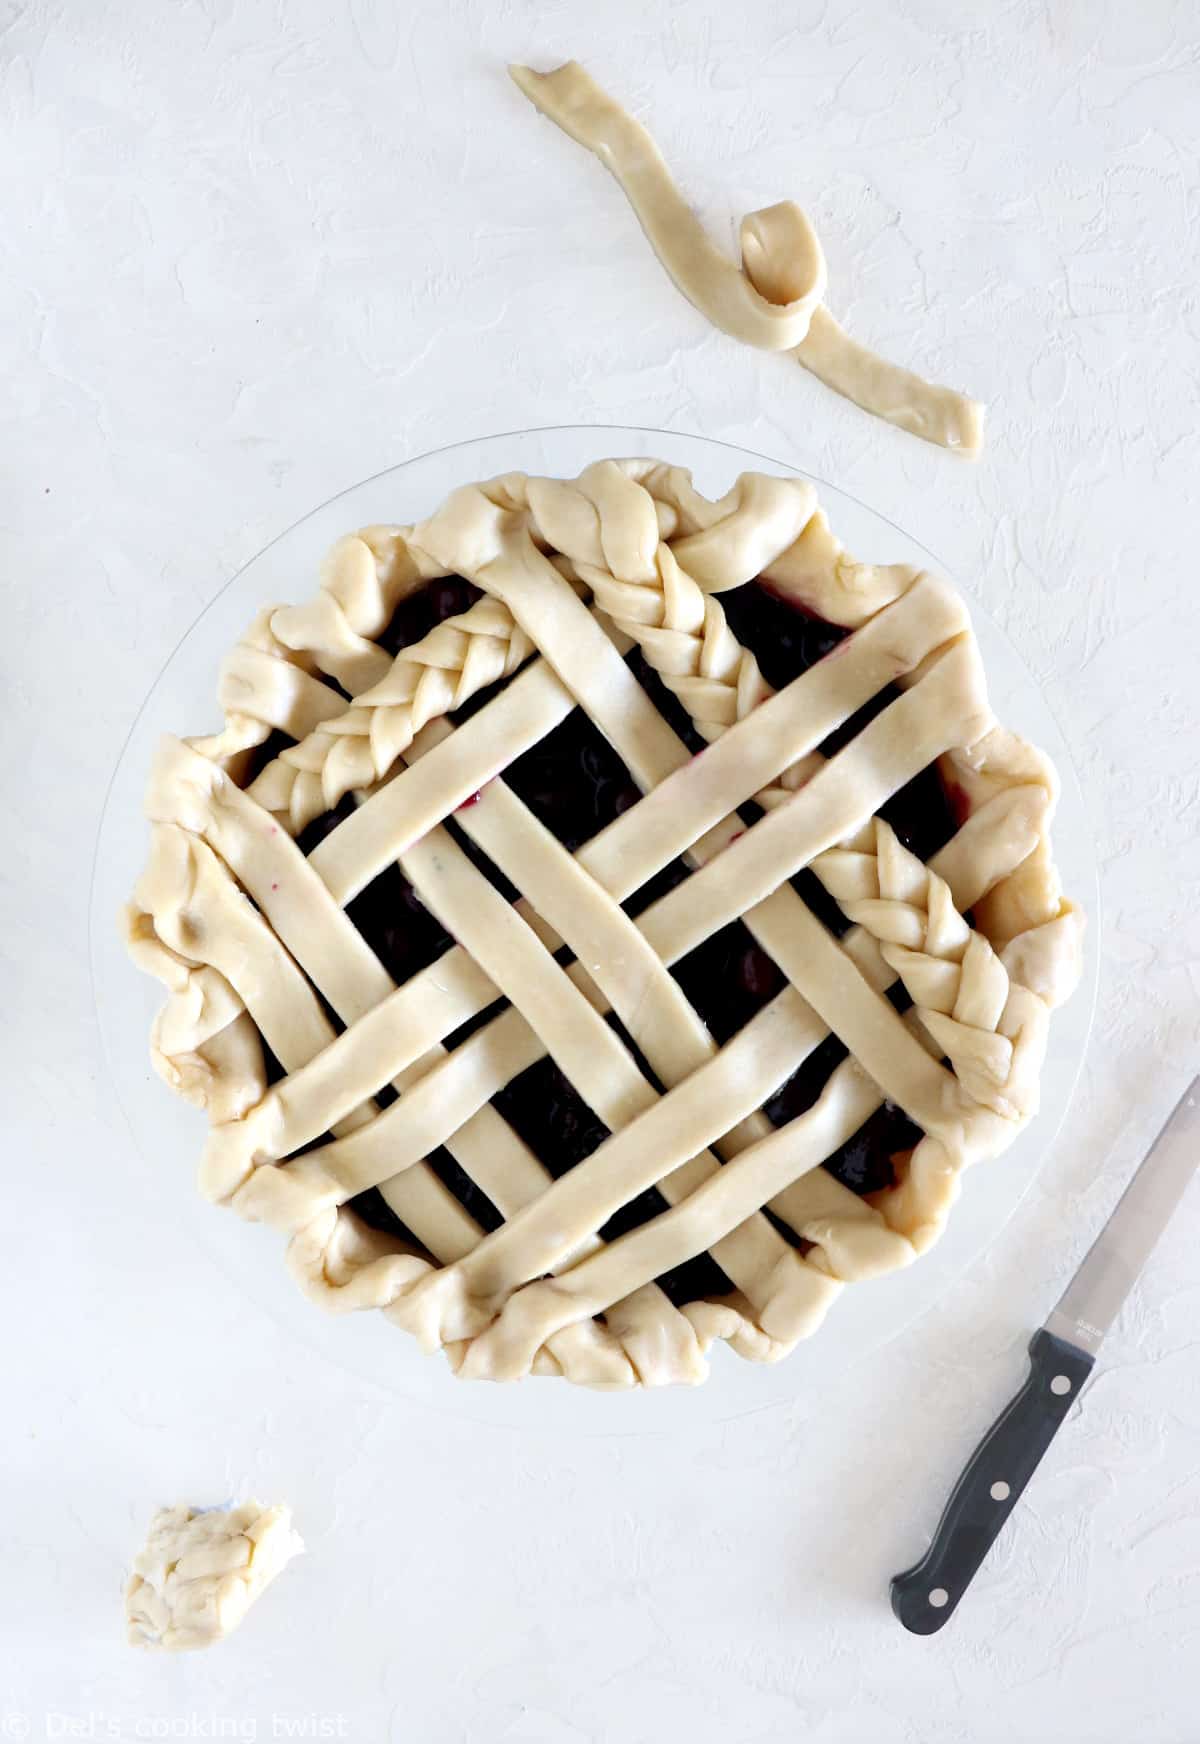
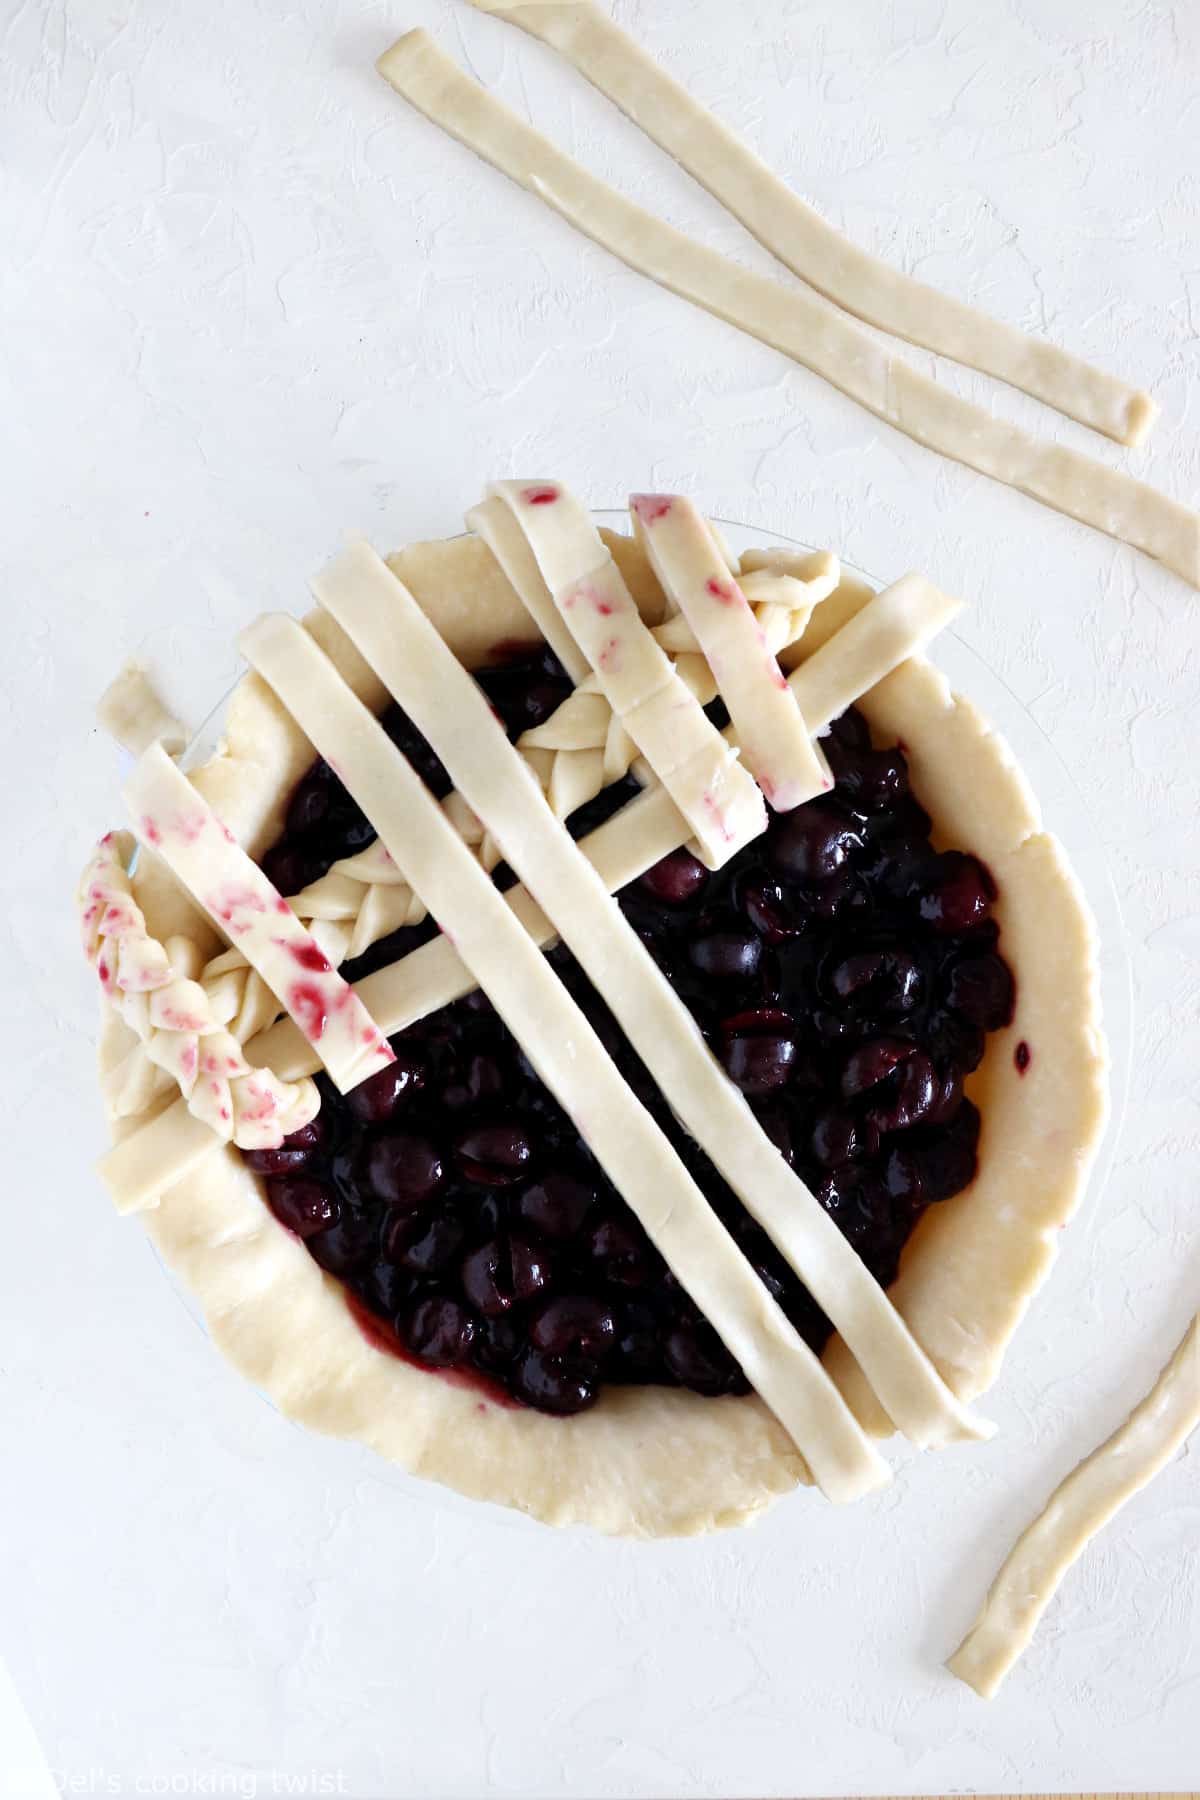
- Fold the parallel strips back down, then fold back the other strips.
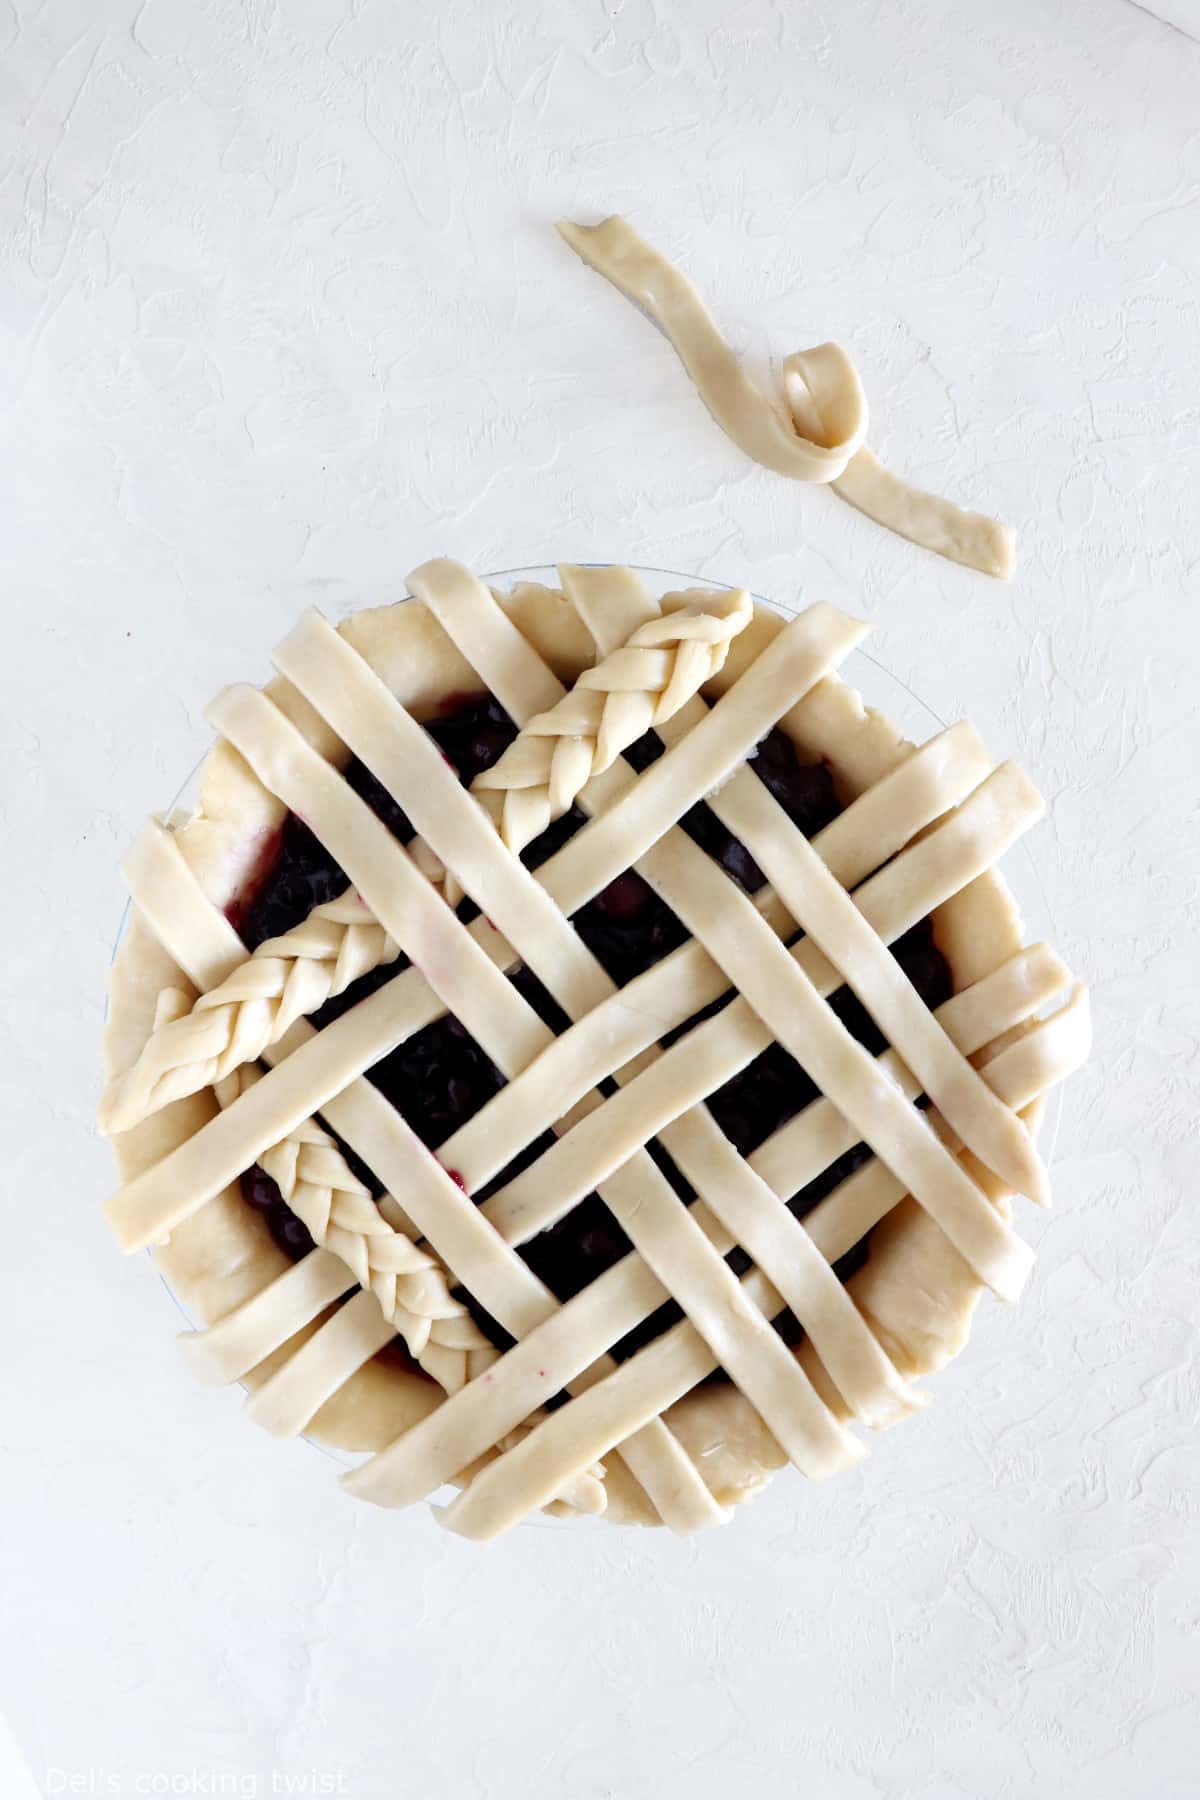
- Repeat from step 7 onward until you’ve achieved a lattice structure.
Tips for successful lattice pie crusts
- The #1 rule is to work with a cold pie dough, always. If you are taking too much time, the pie dough is warming up and the strips become fragile and difficult to handle.
- Use the right thickness for pie crust. You don’t have to measure exactly how thick is your dough but try to estimate the right thickness, not too thick, not too thin, just perfect to handle the strips.
- Use tools if you wish! You can definitely use a ruler to make your strips straight and of equal width. Also, I recommend a pizza wheel instead of a knife to cut the strips, it will make your work much easier.
- Add filling a little bit higher than the pie dish. When cooking, fruits tempt to collapse a little bit and chances are that your lattice crust will become shallow. In order to prevent it, make sure you add extra filling before baking.
- Work fast and go with the flow. In other words, don’t overthink. It might be tempting to be a perfectionist when we make a lattice pie crust, but remember that design comes with creativity. So have fun, use different strip widths, make a few braids if you’d like, and just do you!
- Baking hacks: brush with egg wash and sprinkle sugar before baking to ensure a shimmering final touch. Also, keep an eye on your pie when baking. To ensure pie crust is evenly golden, you can cover the edge when baking, as they tend to brown a little bit faster than the center of the lattice.
Recipe ideas with a lattice pie crust:
More fruit pies to discover:
- Honey Peach Galette
- Blueberry Pie with Oats
- Lavender Apricot Galette
- Rustic Cherry Galette
- French Apricot and Almond Pie
How To Make Lattice Pie Crust
- Prep Time: 45 mins
- Total Time: 45 minutes
- Yield: 1 pie 1x
- Category: Cakes and Pies
- Cuisine: American
Learn how to make a beautiful lattice pie crust over your fruit pies by following my easy step-by-step guide. The weaving technique is way easier than it seems!
Email me this recipe
We’ll send it straight to your inbox, along with weekly food inspiration!
Ingredients
For pie crust x2:
- 3 1/2 cup (15 oz/420g) all-purpose flour
- 1 pinch of salt
- 1 cup + 4 Tablespoons (10 oz/280g) unsalted butter
- 2 teaspoons granulated sugar
- 2/3 cup (5 oz/150 ml) water
For brushing:
- 1 large egg
- 2 teaspoons water or milk
- 2 Tablespoons sugar, for decoration (optional)
Instructions
For the pie crust x2:
- In a medium-sized bowl, mix together the flour and salt. Dice the butter into small pieces and crumble it with the flour until lumps are the size of small peas. Add sugar and stir well. Pour in the iced cold water, little at a time, mixing with a fork. Finish by hand and shape into a ball.
- Divide in two equal parts and wrap each of them into cling film. Place in the refrigerator and chill for about 30 minutes.
How to lattice a pie crust:
- Roll out the first dough on a lightly floured work surface into a large circle about 3 inches (7 cm) wider than the width of the pan dish, and around 1/4″ (5 mm) in thickness.
- Carefully fold the dough, lay it across the pie dish, and gently unfold the crust, using your hands to fit the dough down into the pan. Burst any air bubbles with a fork.
- Fill with pie filling, making sure the filling is a little higher than the pie (it will collapse a little bit while baking).
- Roll out the second pie dough about 3 inches (7 cm) wider than the width of the pan dish. Carefully fold the dough, then unfold on a sheet of parchment paper (if at anytime of the process the dough is too warm to handle, just place the baking sheet in the refrigerator and allow to firm a little).
- Cut the dough into strips, using a pizza cutter or pastry roller. The width of the strips is totally up to you, and you can make one or two braids with the strips if you wish.
- Arrange half of the strips over the pie, in parallel lines.
- Fold back every other strip (or process two by two, it’s up to you).
- Lay a strip over the pie, perpendicular to the others.
- Fold the parallel strips back down, then fold up all the other strips.
- Continue this layering process, weaving the strips over and under each other, until all the strips have been used.
- Trim any excess dough to about a 2-inch (5 cm) overhang.
- Crimp the edges to secure the strips with the bottom pie crust.
- Brush the pie with egg wash (beaten egg and water/milk), and sprinkle sugar on top.
- Bake according to recipe instructions, or until the crust is golden.
Did you make this recipe?
Lastly, if you make this How To Make Lattice Pie Crust, be sure to leave a comment and give this recipe a rating, letting me know how you liked it. And of course, don’t forget to tag me on Instagram! Thank you and enjoy!
A step-by-step guide to lattice a pie crust:


Poonam Patel
Hey! Making this for Christmas but doing a trial run. What thickness should the dough be? Thanks x
Delphine Fortin
Hi! I recommend about 0.2 inch (0,5 cm) thickness for best results. I hope this helps! Del