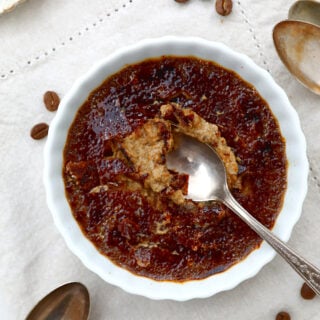
Coffee Crème Brûlée
- Prep Time: 15 mins
- Cook Time: 60 mins
- Total Time: 1 hour 15 minutes
- Yield: 4 servings 1x
- Category: Desserts
This coffee crème brûlée is somewhat fancy, while in reality very easy to make. It features a smooth and creamy coffee custard filling and a caramelized sugar topping, creating a nice contrast of texture. A lovely twist to the classic crème brûlée!
Ingredients
Scale
- 2 cups (480 ml) whipping cream
- 1 teaspoon vanilla extract or vanilla bean paste
- 2 Tablespoons coffee granules
- 5 egg yolks
- ¼ cup (50g) granulated sugar
- 4-6 teaspoons granulated sugar, for sugar coating
Instructions
- Preheat the oven to 215°F (100°C) degrees. Place four 5-inch (13 cm) wide ramekins on a baking tray or large baking dish.
- In a small saucepan, mix the cream, vanilla and instant coffee, and bring to a gentle simmer, making sure the coffee granules dissolve completely. Remove from the heat and set aside.
- In a large bowl, whisk the egg yolks and sugar together until smooth. Slowly pour the coffee cream mixture over, stirring constantly, until the custard is perfectly smooth.
- Pour the custard into the prepared ramekins, and bake for about 60 minutes, or until the sides of the custard are just set but the center is still very slightly jiggly.
- Place on a wire rack to cool down at room temperature for 30 minutes, then transfer to the refrigerator for at least 3 hours, or up to 24 hours.
- For the sugar coating, sprinkle some caster sugar over each coffee custard. Gently shake the ramekins to evenly distribute the sugar and make sure you get an even layer throughout. Using a kitchen blow torch, caramelize the sugar until it turns into a crispy, golden color. Make sure to constantly move the flame and not put it in direct contact of the sugar to avoid burning it. It’s ready, enjoy!
Notes
Recipe Inspired and adapted from A Baking Journey.
© 2026 Del's cooking twist
https://www.delscookingtwist.com/coffee-creme-brulee/